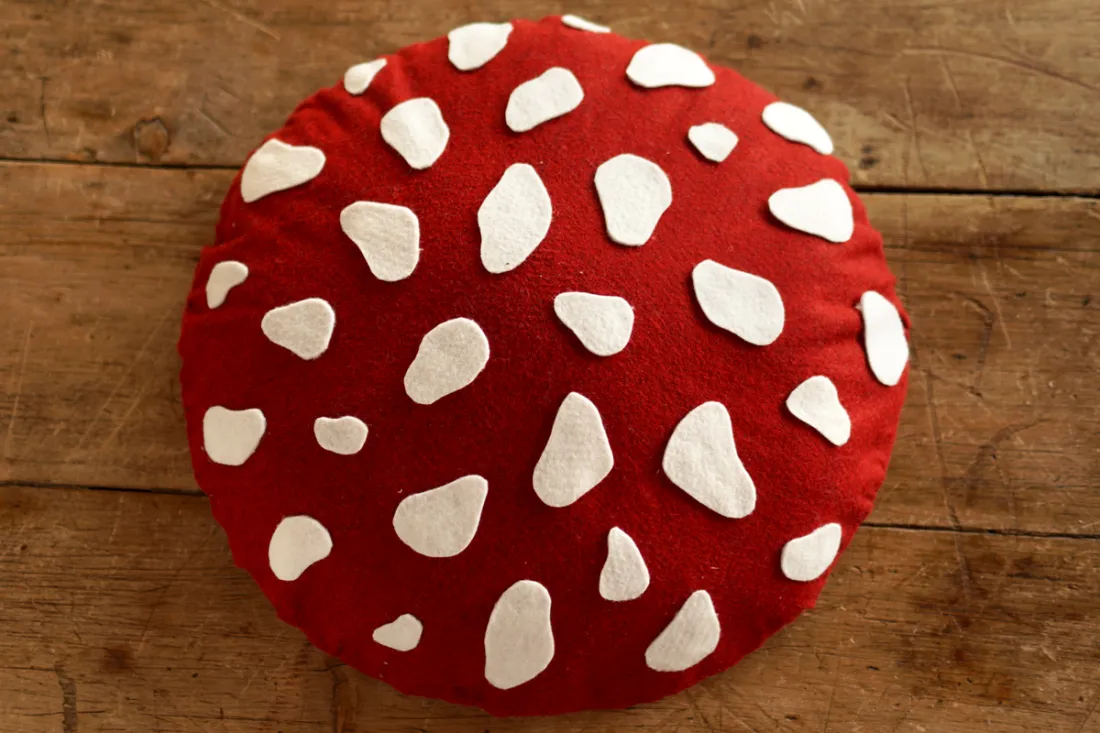
Happy October! Something that I look forward to every year is making Elliot a homemade Halloween costume. I make a couple costumes each year, and since it’s almost mushroom season for us— I thought it’d be fun to make a mushroom costume! I’ll be showing you how to make a no-sew mushroom hat that you can pair with any white clothing that you already own. I included the measurements that I used to make a 21″ circumference hat along with instructions on how to customize the measurements to fit your child’s head. I used recycled materials to make the frame of the hat (old cardboard shipping boxes) and spent less than $20 for the rest of the materials (wool felt/ muslin fabric and glue). The design of this mushroom is inspired by the popular Fly Agaric/Amanita Muscaria mushroom, and you can design your spots in any shape and/or size.
Materials:
– cardboard
– red felt (mushroom cap) — I used a 20″ square of medium weight wool felt for a hat with a 14.5″ diameter brim
– white felt (mushroom scales) — I used a medium weight wool felt
– white textured fabric (underside) — I used a 30″ square of cotton muslin for a hat with a 14.5″ diameter brim
– thick piece of ribbon or long strips of cotton fabric (chin tie)
– hot glue gun
– cotton batting (optional but recommended)
– stuffing (optional but recommended)
– masking tape or gummed water-activated tape
– scissors and xacto knife
– all white clothing
Instructions for making the mushroom costume
Step 1: How to make the cardboard hat frame
Cut a strip of cardboard about 1.5” wide that is long enough to wrap around your child’s head. Using your child’s head as a guide, glue the ends together at the correct circumference, adding an inch or so to accommodate extra fabric that you’ll be attaching underneath the band. Next, cut and attach two additional 1.5” strips and cross them over the top of their head in an X shape. Secure the ends with glue. Make sure the top strips sit flush against their head (to form the inside of the hat).
Step 2: How to make the brim for the cardboard hat
Using a large piece of rigid cardboard, trace a round circle that is several inches larger than the diameter of your child’s head. Ours has a 4″ brim all the way around. Cut the circle out. Next, you’ll need to create a template for the center hole. The center hole will need to be shaped like an oval and you can use the frame that you made above as a guide. Our hat is made to fit a head circumference of about 21″, and the oval template I made for the center hole measures 6.5″ x 7″. Trace around the template and cut the hole out using an xacto knife.
Step 3: How to attach the hat frame to the brim
Attach the brim to the hat frame using masking tape or gummed water activated tape (see photo for reference). Next, cut and attach four additional 1.5” strips across the entire top of the hat, filling in the open areas and forming the top dome. Secure all ends with glue.
Step 4: How to create the mushroom’s gills
Cut a circle that is 12″ larger across than the diameter of your hat’s round brim (our hat is 14.5″, so our circle was 26.5″). Create a larger oval template that is 8″ larger than your original and use this template to cut a hole out of the center of the fabric (our original template was 6.5″ x 7″, so our template for this one was 14.5″ x 15″). You should end up with a piece of fabric that looks like a large version of your brim. It is larger because we will be scrunching it inwards to mimic the look of mushroom gills. With the brim upside down, start attaching the fabric around the inside hole using your hot glue gun, overlapping the fabric as you go.
Step 5: Attaching the mushroom’s gills and making the cap
After you’ve attached all of the fabric around the inside of the crown, attach the fabric along the outside of the brim using the same overlap method. Flip the hat over. Cut a circle out of your red felt that is roughly 4″ larger than the diameter of your hat’s brim. (You may need to adjust depending on how high your dome is- cut a larger circle than you think you’ll need because we’ll be cutting the excess off anyways).
* optional step: Cut a circle of batting out that is slightly smaller than your red felt. Place this between your cardboard frame and red felt for extra padding)
Center the circle over the top dome and start glueing it down along the edges, scrunching evenly as you go all the way around.
* optional step: With your hat upside down, insert stuffing through the open spaces along the outer edges for structure.
Step 6: How to attach the spots and ties
After you’ve attached all of the felt around the edges of the brim, cut any excess felt off. Using your white felt, cut out several spots that are any shape and/or size and attach them with hot glue or fabric glue. Cut two pieces of ribbon or strips of cotton fabric and attach them inside each side of the hat to use as ties.
Step 7: How to style the mushroom costume
You’re finished! Dress your child in all white clothing or clothing with texture or fringe.